During this past Red Hat Summit I worked on a session with Mobile, Fuse and BPMS. It was a great pleasure working with Phil Simpson, Javier Perez and Maggie Hu to build and present the demo. Below I walk through setting up and using the Push Notification Server. For information on submitting claims through the mobile application and the adjudicator review you can review Maggie's Blog on Red Hat Mobile Application Platform - Connecting to JBoss BPMSuite REST.
This article is part of a series we're putting together for the Build an Enterprise Application in 60 Minutes with JBoss Middleware session at the Summit. The original slide decks can be found below from Maggie on Slideshare. Please take a look at the slide decks to get a better idea on the use case we're working with.
Basically, we're allowing people to submit claims quickly from their mobile devices with some basic information when an auto accident happens. The claim will get submitted to the insurance company, an adjudicator will review the claim, set the settlement amount, and complete the claim. Then the policy holder will receive a push notification on their mobile device on the settlement amount.
The Unified Push Server allows developers to send native push messages to Apple’s Push Notification Service (APNS) and Google’s Cloud Messaging (GCM). It features a built-in administration console that makes it easy for developers to create and manage the push related aspects of their applications for any mobile development environment. Includes client SDKs (iOS, Android, & Cordova), and a REST based sender service with an available Java sender library.


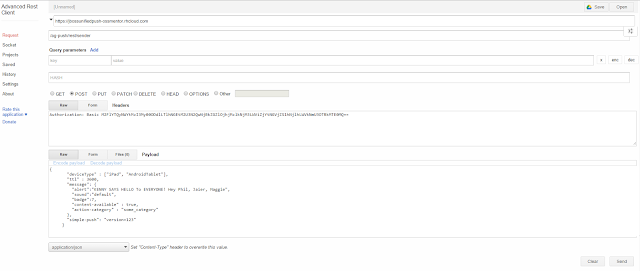
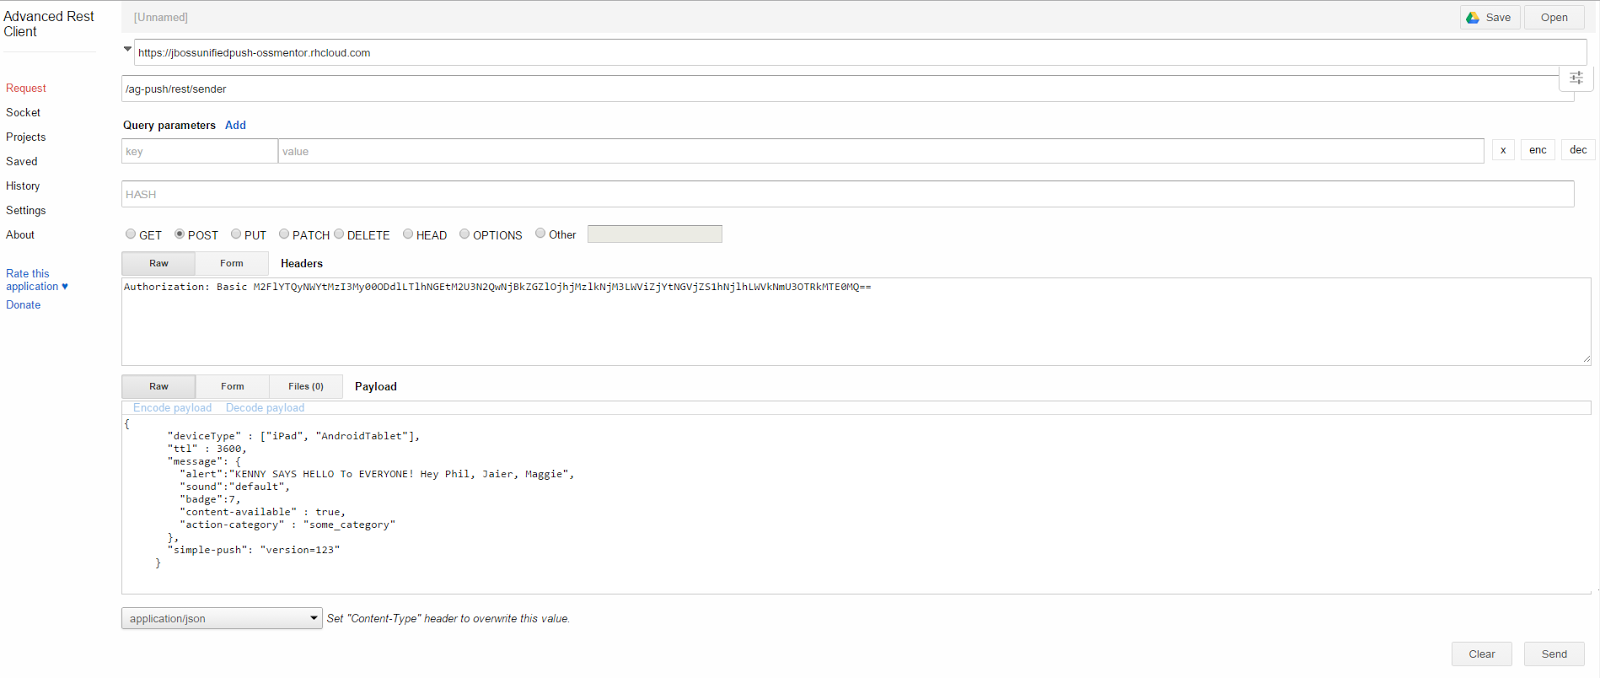
I used the Advanced REST Client in Chrome to test the message. I setup the project with the URL, the Authorization and Content Type as shown below. I put in some sample data for the notification.


References:
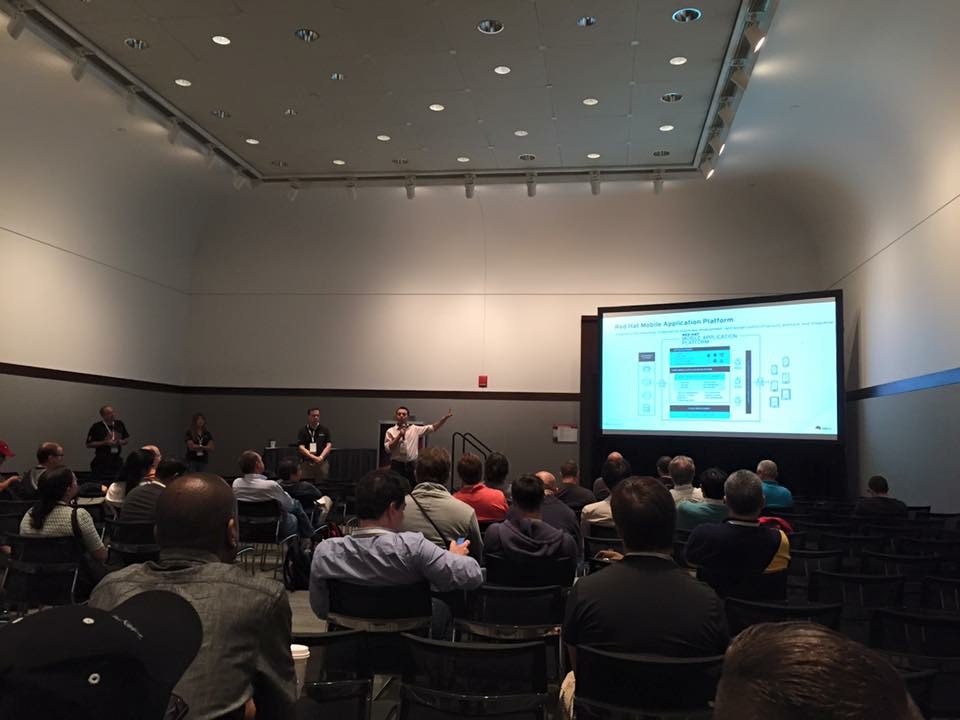 |
| Red Hat Summit 2015 - Photo Taken by Wanja Pernath |
Basically, we're allowing people to submit claims quickly from their mobile devices with some basic information when an auto accident happens. The claim will get submitted to the insurance company, an adjudicator will review the claim, set the settlement amount, and complete the claim. Then the policy holder will receive a push notification on their mobile device on the settlement amount.
What is Push Notification and its benefits?
A push notification is a message or alert delivered by a centralized server (on premise or cloud) to a device. Unlike pull notifications, in which the client must request information from a server, push notifications originate from a server. Typically, the end user must opt-in to receive alerts; opt-in usually takes place during the install process and end users are provided with a way to manage alerts if they change their minds later on.
An important advantage of push notifications in mobile computing is that the technology doesn't require specific applications on a mobile device to be open in order for a message to be received. This allows a smartphone to receive and display social media or text message alerts even when the device's screen is locked and the social media application that is pushing the notification is closed.
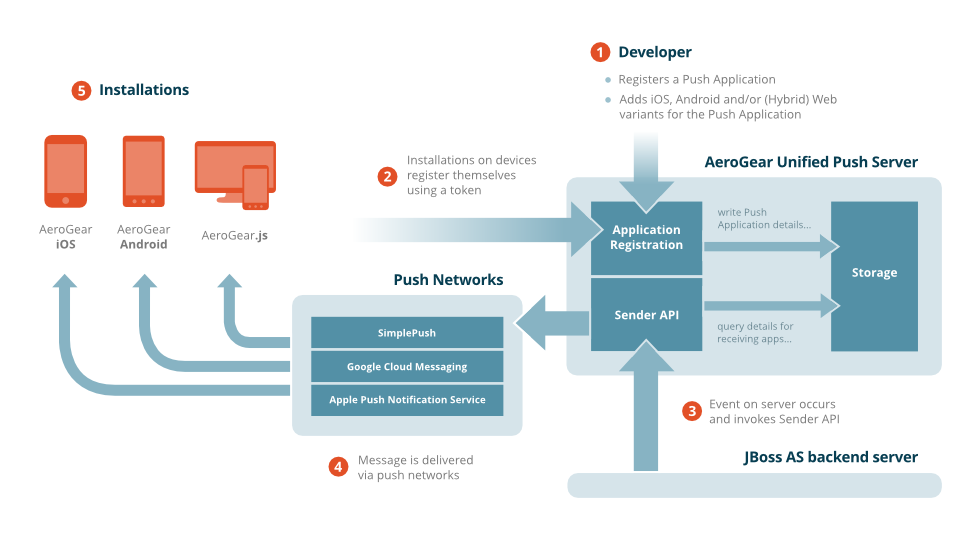
The Red Hat Mobile Unified Push Server (Aerogear) can be seen as a broker that distributes push messages to different 3rd party Push Networks. The graphic below gives a little overview:
- One PushApplication and at least one mobile platform variant must be created.
- The variant credentials that are generated and stored by the UnifiedPush Server must be added to the mobile application source, enabling the application to register with the UnifiedPush Server once it is installed on mobile devices.
- Sending a push message can happen in different ways: The AdminUI can be used to send a (test) message to registered devices. However, in a real-world scenario the Push Notification Message request is triggered from a backend application, which sends its requests using the Sender API. Different SDKs for different languages are supported.
- The push request is then translated into platform specific details for the required variant Push Network. The Dashboard of the AdminUI gives a status report if a message is sent to the Push Network.
- The UnifiedPush Server does not directly deliver the message to the mobile device. This is done by the appropriate variant Push Network. Note: There can be latency in the actual delivery. Most Push Networks, such as APNs or GCM, do not guarantee to deliver messages to mobile devices.
Setting Up the Unified Push Server on Openshift
The Unified Push Server allows developers to send native push messages to Apple’s Push Notification Service (APNS) and Google’s Cloud Messaging (GCM). It features a built-in administration console that makes it easy for developers to create and manage the push related aspects of their applications for any mobile development environment. Includes client SDKs (iOS, Android, & Cordova), and a REST based sender service with an available Java sender library.
In our example we setup the UPS on Openshift instead of on premise and we do this through the Openshift Application Manager. First we need a Openshift account. You can sign up for a free account for 3 small gears.

Next we will create an openshift application.

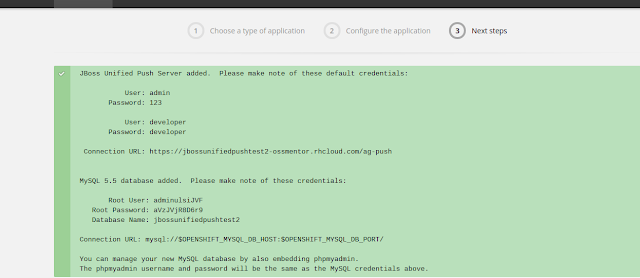
We will use the Unified Push Server 1.0 Cartridge which will also add MySQL to the Application. We can take the defaults and click Create Application Button. After creating the application a credentials screen is displayed with URLs and credentials.

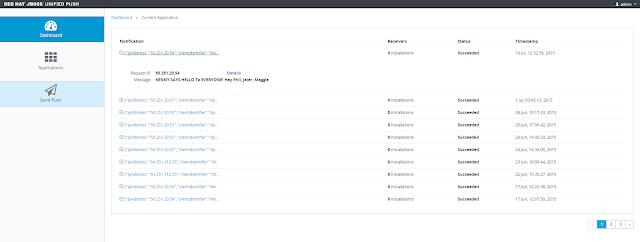
Now we can sign onto the console to create applications, variants, etc and monitor messages. Let's open the dashboard for the Push Server, ie https://jbossunifiedpushtest2-ossmentor.rhcloud.com/ag-push, and login with admin/admin which will bring up the dasboard main screen.

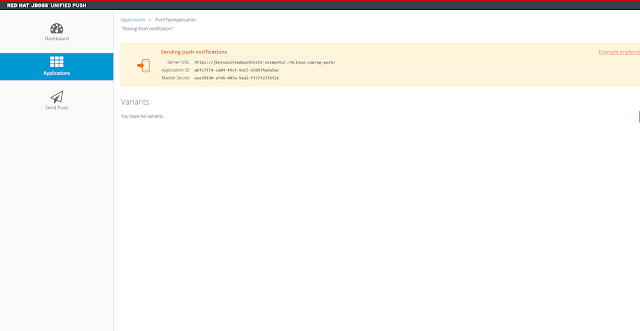
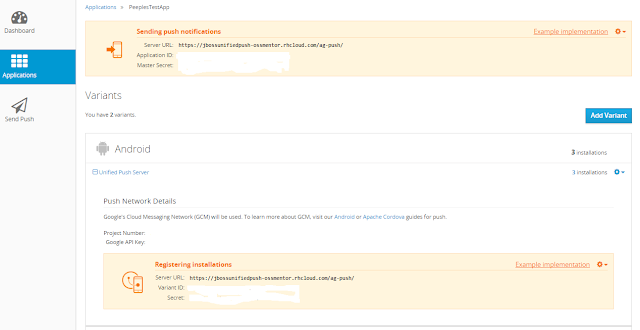
Now we want to add an application to receive the push notifications. We click on applications and the create application button. Once created we can look at the variants. This shows the application ID and Master Secret for the application which we will use in our example.

At this point we can create variants for Android and iOS. For this first example we will create an application but won't use variants and register devices. We will just show the notification getting to the push notification server. Now that the application is created let's do a quick test.
Test sending a message to the UPS
I used the Advanced REST Client in Chrome to test the message. I setup the project with the URL, the Authorization and Content Type as shown below. I put in some sample data for the notification.
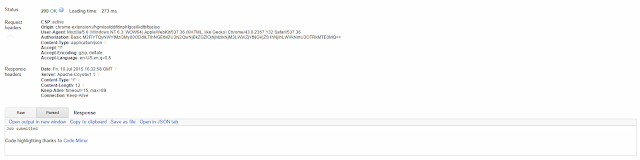
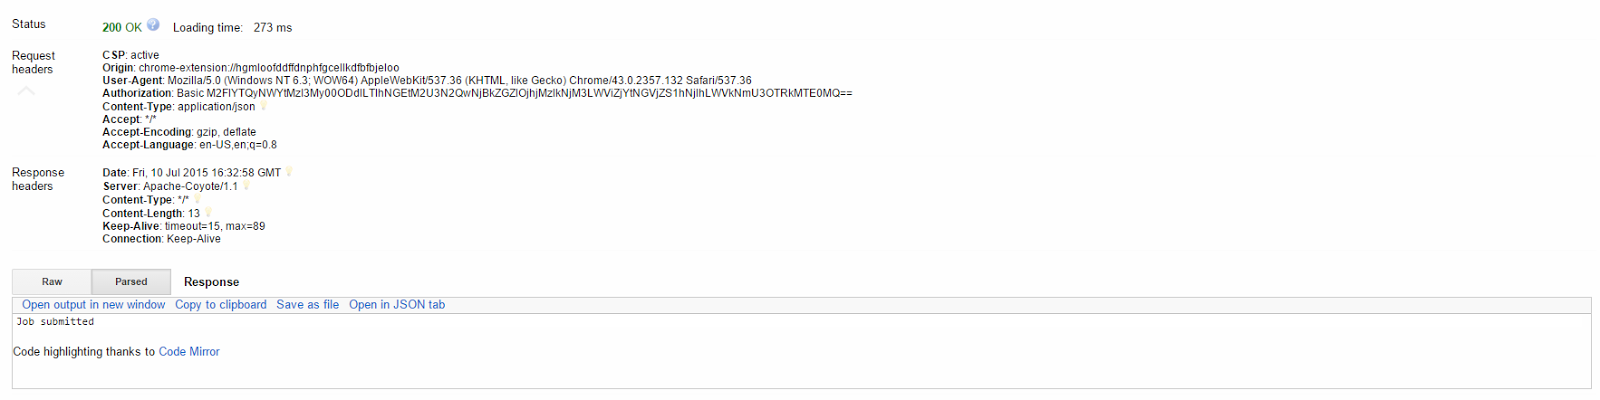
After clicking on send I get a Job submitted response and can lookup the message in the dashboard.

Now let's move onto how we can make the call from BPMS.
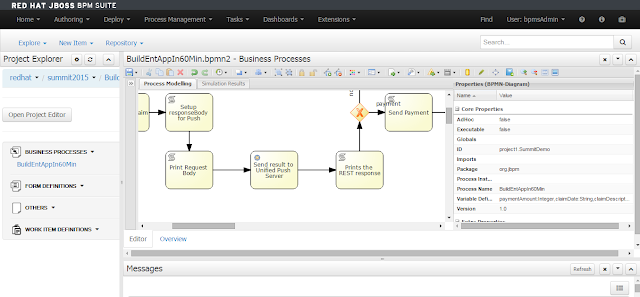
Sending a notification message from BPMS to the UPS
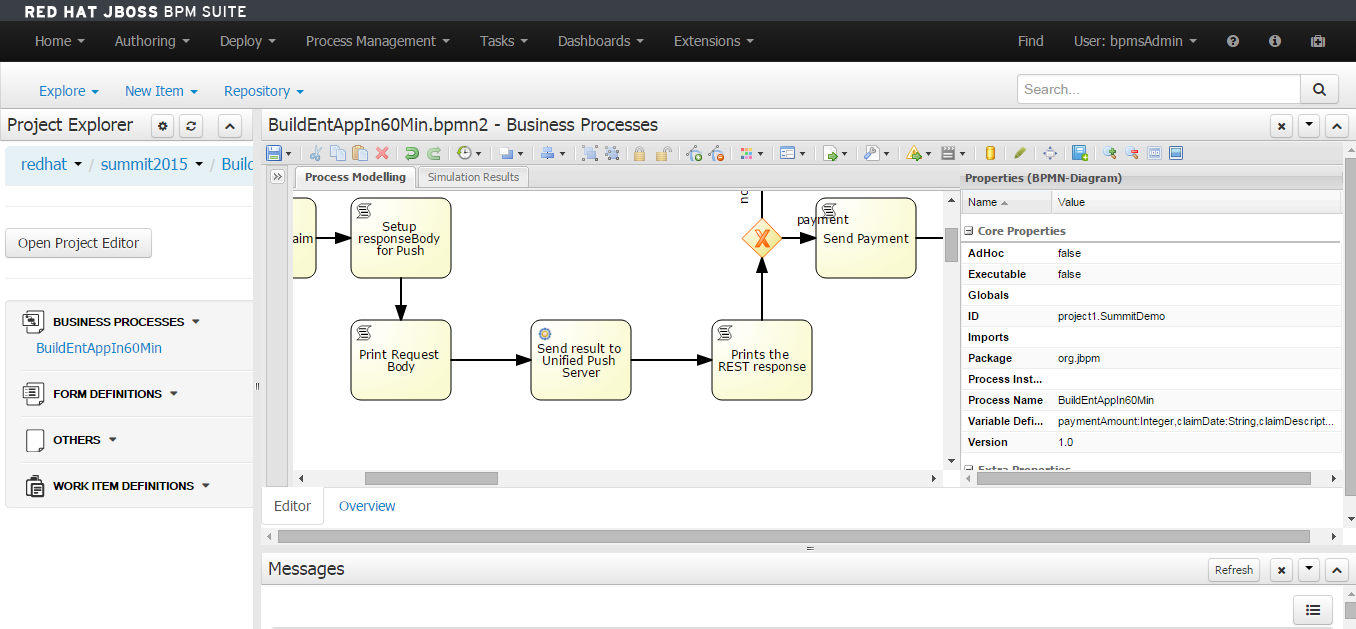
First in our Business Process we add the message in a script task to the Response Body for the REST call.
kcontext.setVariable("requestBody","{\"ttl\":3600,\"message\":{\"alert\":\"Your Payment Amount is:"+kcontext.getVariable("paymentAmount")+"\",\"action-category\":\"some value\", \"sound\":\"default\",\"badge\":2,\"content-available\":true},\"simple-push\":\"version=123\"}");
Next in our Business Process we added a REST Task to make the call to the UPS to send the claim award message. A couple of items to note on the Task. The first is the data assignments. The username is the Application ID and the password is the Master Secret as seen in the screen shots below. Also note the URL for the domain REST API for UPS in addition to the Basic Authorization.


Note the App settings in addition to the Android Variant settings for Google Cloud messaging.
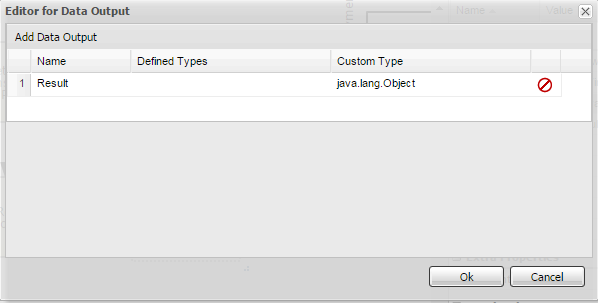
Also in the REST Task we setup the Data Input and Output as indicated below.

One additional item that was required is the work definition as displayed below.
import org.drools.core.process.core.datatype.impl.type.StringDataType;
import org.drools.core.process.core.datatype.impl.type.ObjectDataType;
[
[
"name" : "Email",
"parameters" : [
"From" : new StringDataType(),
"To" : new StringDataType(),
"Subject" : new StringDataType(),
"Body" : new StringDataType()
],
"displayName" : "Email",
"icon" : "defaultemailicon.gif"
],
[
"name" : "Log",
"parameters" : [
"Message" : new StringDataType()
],
"displayName" : "Log",
"icon" : "defaultlogicon.gif"
],
[
"name" : "WebService",
"parameters" : [
"Url" : new StringDataType(),
"Namespace" : new StringDataType(),
"Interface" : new StringDataType(),
"Operation" : new StringDataType(),
"Parameter" : new StringDataType(),
"Endpoint" : new StringDataType(),
"Mode" : new StringDataType()
],
"results" : [
"Result" : new ObjectDataType(),
],
"displayName" : "WS",
"icon" : "defaultservicenodeicon.png"
],
[
"name" : "Rest",
"parameters" : [
"Url" : new StringDataType(),
"Method" : new StringDataType(),
"ConnectTimeout" : new StringDataType(),
"ReadTimeout" : new StringDataType(),
"Username" : new StringDataType(),
"Password" : new StringDataType()
],
"results" : [
"Result" : new ObjectDataType(),
],
"displayName" : "REST",
"icon" : "defaultservicenodeicon.png"
]
]
That was all that is required to send a push notification from BPMS to the Unified Push server. You can see the messages in the UPS console.
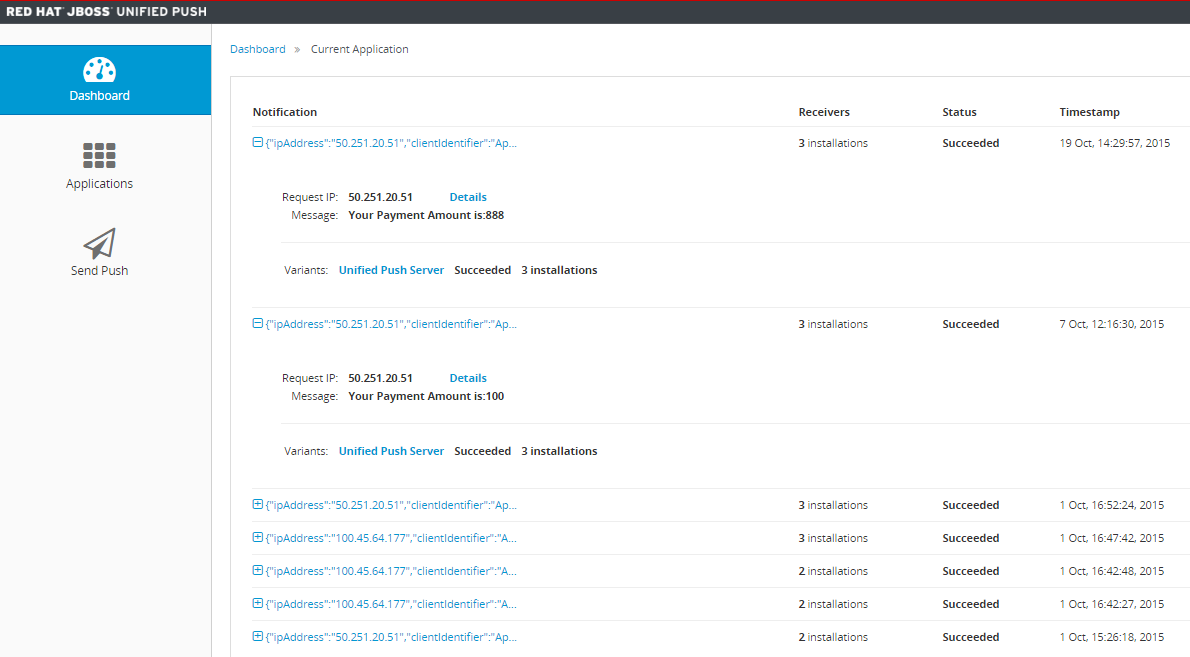
All variants associated with the Application in UPS will receive the notification. We will cover the Android application in a follow up article to register the device with Google Cloud Messaging (GCM) and receive the notification.
References:
http://searchconsumerization.techtarget.com/definition/push-notification
https://aerogear.org/docs/unifiedpush/ups_userguide/index/
https://developers.openshift.com/en/xpaas-unified-push.html